
Table of Contents
As a boat owner, I understand the importance of properly winterizing an inboard boat motor. If you want to keep your boat in top shape, it’s crucial to prepare it for the colder months. This not only protects the vessel from potential damage but also helps prolong the life of the boat’s motor. In this article, I’ll be sharing valuable insights on how to winterize an inboard boat motor.
Before diving into the steps, I’d like to emphasize the essential aspects of this process, such as using a fuel stabilizer, draining all water from the vessel, and adding antifreeze to the system. Additionally, it’s crucial to pay attention to details like changing the engine oil and oil filter, inspecting the exhaust system and hoses, and using fogging oil for optimal results.
Now that I’ve given you a brief overview of the process, let’s get started on the steps to properly winterize your inboard boat motor. By the end of this article, you’ll be equipped with the knowledge and confidence to tackle this task head-on and ensure your boat remains in perfect condition during those long winter months.
Understanding Inboard Boat Motors
As someone who has experience with inboard boat motors, I know how crucial it is to properly maintain them, particularly during winter. Inboard motors are installed inside the boat’s hull and are connected to the boat’s propeller shaft, which is responsible for moving the boat through the water. These motors primarily run on gasoline or diesel fuel and come in various horsepower ratings to accommodate different boat sizes and purposes.
One of the key differences between inboard motors and outboard motors, which are attached externally to the stern of a boat, is their cooling system. While outboard motors generally use the surrounding water to cool the engine, inboard motors use a closed-loop cooling system. This system typically consists of a heat exchanger, antifreeze, and water pump. In colder temperatures, it’s crucial to winterize your inboard motor to prevent damage from freezing temperatures.
The process of winterizing an inboard boat motor involves a few key steps:
- Ensure the gas tank is full with proper fuel stabilizer
- Flush the cooling system and add propylene glycol antifreeze
- Apply fogging oil to the engine
- Change the engine oil and oil filter
Taking these steps will help protect the motor from potential damage caused by freezing temperatures, moisture, and condensation during winter months when the boat is not in use.
It’s important to follow a specific procedure and use the right materials when winterizing an inboard boat motor. Correctly doing so will not only prolong the life of the motor but also ensure a smoother and safer boating experience when you’re ready to hit the water again.
Remember, investing time, effort, and resources into winterizing your inboard motor is essential for maintaining its performance, longevity, and reliability.
The Importance of Winterization
As a boat owner, I understand that winterizing an inboard boat motor is a crucial preventive measure to ensure the longevity and proper functioning of my watercraft. Since boats typically sit idle during the colder months, it is vital to protect their systems and components from freeze damage and potential wear that can occur from inactivity.
During my experience with winters, I’ve noticed that essential boat systems such as inboard engines, batteries, and lower units can be at risk if not adequately winterized. One method I’ve found particularly useful for inboard engines is using antifreeze (propylene glycol) to fill the system. This not only prevents freezing but also helps maintain the internal components to be protected against corrosion.
Additionally, I firmly believe that proper winterization helps save time and money in the long run. By taking care of my boat’s engine and other vital systems during the off-season, I minimize the chances of costly repairs when the boating season starts again. Moreover, it allows me to get more use out of my investment and enjoy hassle-free outings on the water once the warmer weather arrives.
Required Tools and Materials
In this section, I will provide information on the necessary tools and materials needed to winterize an inboard boat motor. As I discuss the required items, I will break them down into three sub-sections: Basic Tools, Specific Boat Motor Tools, and Safety Equipment.
Basic Tools
Some common basic tools you will need during the winterization process are as follows:
- Wrenches and socket sets
- Screwdrivers (flathead and Phillips)
- Pliers
- Hose clamp pliers
- Funnel
- Hammers
- Clean cloth
These essential tools will ensure you can perform general maintenance tasks during the winterization process.
Specific Boat Motor Tools
For winterizing your inboard boat motor, there are some more specialized tools and materials you’ll need. This list includes:
- Fuel stabilizer: This is important to prevent any fuel-related issues caused by fluctuating temperatures during winter.
- Propylene glycol antifreeze: This is a non-toxic antifreeze that will protect your engine and water system from freezing in low temperatures.
- Fogging oil: Helps protect internal engine surfaces from corrosion during storage.
- Motor flusher and garden hose: Needed to flush the cooling system before adding antifreeze.
- Marine oil change pump: Used to extract old engine oil before adding new oil and a new oil filter.
- Fresh engine oil and oil filter: Necessary for clean and efficient engine performance.
These specific tools and materials are vital for a successful winterization process tailored to your inboard boat motor.
Safety Equipment
Safety should always come first when working on any boat maintenance task. Here are some essential safety items you should have on hand:
- Goggles or safety glasses: To protect your eyes from debris and harmful chemicals.
- Gloves: To shield your hands from hot surfaces, sharp objects, and chemicals.
- Non-slip shoes or boots: To avoid slipping on wet surfaces and provide you with adequate foot protection.
- Fire extinguisher: In case of any accidental fire hazards during the maintenance process.
Having these safety items around will help ensure a safe winterization process for your inboard boat motor.
Stabilizing the Fuel System
Fuel Additives
When winterizing my inboard boat motor, I begin by stabilizing the fuel system. To do this, I add a fuel stabilizer to the gas tank. The stabilizer protects the fuel from degradation and helps prevent the formation of gum and varnish in the fuel lines and carburetor. It’s essential to select the right fuel stabilizer for the type of fuel used in my boat. I carefully follow the manufacturer’s recommended dosage and mix it with the fuel before filling the tank.
I also ensure that my fuel tank is almost full, as a fuller tank minimizes the risk of condensation forming inside. When it comes to additives, it’s important to note that some fuel stabilizers have water-removing properties, which can be beneficial when winterizing the boat.
Running the Engine
After adding the fuel stabilizer, I run the engine for about 10-15 minutes to ensure the treated fuel has circulated through the entire fuel system. This process helps coat the internal engine components and protects them from corrosion during the winter months. Additionally, running the engine warms up the oil, making it easier to drain cleanly when changing the oil and oil filter.
It’s crucial to monitor the engine temperature during this time to avoid overheating, and ensure that proper cooling water flow is maintained. Once I have completed this step, I proceed with draining and replacing the engine oil, and attending to other winterizing tasks such as adding antifreeze and inspecting the exhaust system.
Draining the Cooling System
Before winterizing your inboard boat motor, you need to drain the cooling system. As a first-person singular, I highly recommend the following steps to ensure a successful draining process.
First, I would make sure that the engine is cooled down. I wouldn’t want to work on a hot engine, as it can result in injury. Once the engine is cool, I locate the drain plugs on the engine block and exhaust manifolds. These plugs can often be found at the lowest points of the equipment, where the water tends to collect.
To facilitate the process, I disconnect the hoses from the engine’s water pump and exhaust system. This will allow any remaining water to drain out more easily. Next, I remove the drain plugs from the engine block and exhaust manifolds. As the water drains, I keep a bucket or container nearby to collect it and avoid making a mess.
While waiting for the cooling system to drain completely, I take the opportunity to inspect hoses and clamps for any damage or wear. If I see any issues, I make a note to replace those parts later on.
Once the water is drained, I reinstall the plugs and reconnect the hoses tightly. It’s essential to ensure that everything is reassembled correctly to prevent leaks and other issues. Finally, I may also opt to add some antifreeze to the cooling system so it can survive the winter without the risk of freezing.
Overall, draining the cooling system is an essential step in winterizing an inboard boat motor. By following these steps, you can help maintain your engine and ensure it’s ready for the next boating season.
Fogging the Engine
As I winterize my inboard boat motor, fogging the engine is an essential step to prevent corrosion during the winter storage period. For this process, I make sure to follow these guidelines to ensure it’s done correctly and efficiently.
Firstly, I start the engine and let it warm up to its operating temperature. This helps the oil and other fluids circulate properly, ensuring that the fogging oil will effectively coat and protect the internal components of the motor.
Once the engine is warmed up, I then locate the carburetor or fuel injection system, depending on my boat’s engine type. For a carbureted engine, I use an aerosol can of fogging oil and spray it directly into the carburetor while the engine is still running. It’s important to do this gradually to avoid overwhelming the engine with the oil.
On the other hand, for a fuel-injected engine, I follow the manufacturer’s instructions for fogging, which typically involve removing the air filter and spraying the fogging oil into the throttle body. It’s crucial to make sure that the fogging oil reaches all the engine’s cylinders.
After applying the fogging oil, I let the engine run for another minute to spread the oil throughout the internal components. This ensures that the oil adequately coats the engine’s internal surfaces, protecting them from moisture and corrosion during the winter months.
Finally, I shut off the engine and remove its spark plugs. I then spray a small amount of fogging oil into each cylinder, followed by manually turning the engine over a few times to distribute the oil evenly. Reinstalling the spark plugs completes the process, and my engine is now properly protected for the winter season.
Overall, fogging the engine is a vital step in winterizing my inboard boat motor, ensuring that it remains protected from corrosion and is ready for use when the boating season returns.
Changing the Engine Oil
Oil Removal
In order to properly winterize an inboard boat motor, I always start by changing the engine oil. First, I heat up the engine by running it for a few minutes. This helps to loosen any contaminants and makes the oil flow more easily. I then shut off the engine and place an oil drain pan under the drain plug or oil filter, depending on my engine’s configuration. Carefully, I remove the plug or filter to allow the old oil to drain completely into the pan. If necessary, I will use an oil extractor or pump to remove oil from hard-to-reach places.
Oil Replacement
Once I’m sure that all the old oil has been drained, I take time to clean the drain plug area and replace the sealing washer if needed. Next, I install a new oil filter, tightening it according to the manufacturer’s specifications. After that, I get ready to add fresh oil to the motor. Checking my engine’s owner’s manual, I find the correct type and quantity of oil needed, and then I carefully pour it through a funnel into the engine.
While pouring, I pause periodically to check the dipstick, ensuring that I have the correct level of oil in the engine. Finally, I run the engine again, checking for any leaks or oil pressure issues. Once everything seems to be in order, I shut off the engine and double-check the oil level one last time to confirm it’s at the appropriate level.
By following these steps, I ensure that my inboard boat motor is well-prepared for winter storage with clean oil, helping to protect it from corrosion and extend its lifespan.
Protecting the Battery
When winterizing an inboard boat motor, it’s important for me to protect the battery from the harsh cold temperatures. Boat batteries can indeed freeze if exposed to extreme cold, and cold temperatures can slowly drain and damage most batteries over time. To ensure the battery remains in good condition, I must take certain precautions.
Firstly, I need to inspect the battery for any visible signs of damage or wear, such as cracks, bulging, or leaks. If I find any issues, it’s best to replace the battery before winter sets in, to avoid any problems when it’s time to use the boat again.
Secondly, I should disconnect the battery from the boat, and store it in a cool, dry place, preferably indoors. This helps protect the battery from temperature fluctuations and moisture. If the boat is stored for more than a few days in freezing conditions, using a trickle charger can maintain the battery and keep it from losing its charge. I’ve found that a marine-specific trickle charger, like the one available on Amazon, works well for this purpose.
Finally, it’s imperative for me to clean the battery terminals and connectors. I usually use a mixture of baking soda and water to remove any corrosion or build-up. After cleaning, I dry the terminals and apply a thin layer of dielectric grease to protect them from moisture and further corrosion.
By following these steps, I can ensure my boat’s battery remains in good condition throughout the winter months and be ready to use once boating season resumes.
Cleaning and Protecting the Engine Bay
I always begin the winterization process by cleaning the engine bay, as it’s essential to prevent rust or corrosion and keep the engine components in good condition. I first ensure that the area is well-ventilated and free of any debris, dirt, or contaminants. Then, I proceed to wipe down the engine and its surrounding components with a clean cloth or rag, removing any oil, grease, or grime.
Once the initial cleaning is complete, I apply a layer of corrosion inhibitor or engine fogging oil to the engine’s metal surfaces, paying special attention to any exposed or vulnerable parts. This helps protect the engine from rust and corrosion throughout the winter months and keeps it in top shape for the next season. To ensure proper coverage, I use a clean cloth or a spray can to apply the inhibitor or fogging oil, making sure to reach all of the engine’s crevices and hard-to-reach areas.
In addition to protecting the engine, I also check the engine bay’s wiring, hoses, and electrical connections for any signs of wear or damage. I repair or replace any damaged components as needed, then secure any loose connections or hoses with zip ties or clamps. This helps prevent damage during storage and ensures that the boat will be ready to go when the new boating season begins.
To finish up the cleaning and protecting process, I take the time to inspect the engine bay for any missing or damaged insulation, as this can lead to condensation and eventual corrosion. If necessary, I replace or repair the insulation to ensure that the engine bay stays dry and clean throughout the winter months.
By following these steps, I can rest assured that my inboard boat motor’s engine bay will be properly cleaned and protected during the off-season, helping to prevent any potential issues or costly repairs come springtime.
Covering and Storing Your Boat
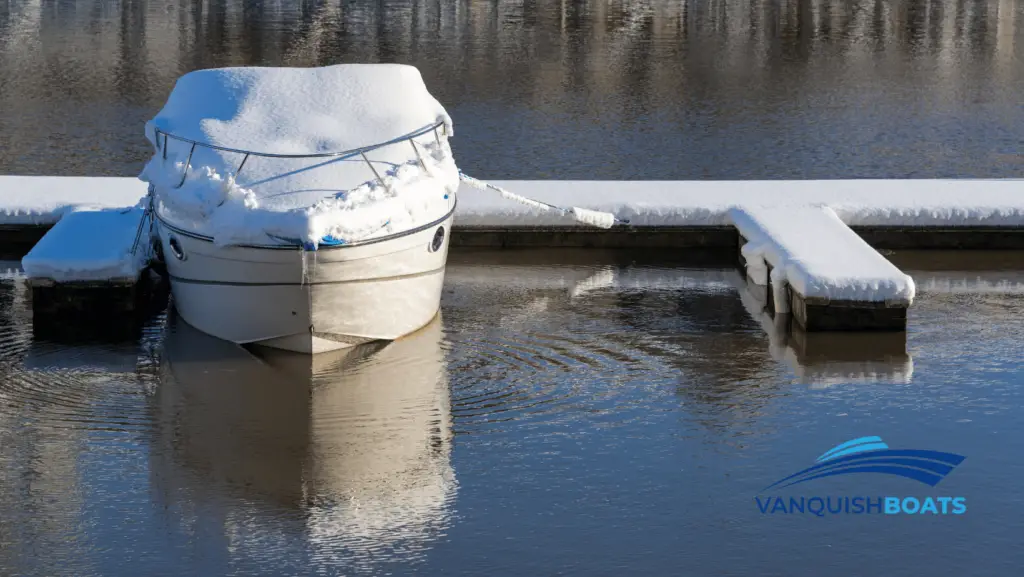
When it comes to winterizing my inboard boat motor, covering and storing it safely and adequately is an essential step. Winter weather can cause significant damage to the exterior and interior components of my boat. That’s why I make sure to protect it from harsh conditions.
First, I clean and dry my boat thoroughly before storing it. This removes any dirt, debris, or excess water that may cause damage while in storage. By doing so, I ensure that my boat remains in good condition when I’m ready to take it back out on the water next season.
Next, I invest in a high-quality boat cover made from durable material to shield my boat from the elements. I look for a cover that is tightly woven, weather-resistant, and capable of keeping out moisture, dust, and UV rays. A well-fitting cover is crucial in preventing mold, mildew, or corrosion while my boat is being stored.
For additional protection, I make sure to support the boat cover properly to prevent water or snow from pooling on it. I use support poles and straps to make sure the cover stays in place and avoids damage from strong winds or heavy snowfall.
When it comes to finding the right location for my boat, I consider either indoor or outdoor storage options. If I have access to indoor storage, I opt for it because it’s the best way to shield my boat from the elements. However, if I need to store my boat outdoors, I ensure that it’s securely positioned and well-protected. Dry storage, like a boat cradle or a trailer, lifts the boat off the ground, protecting the hull from moisture, debris, and pests.
In a nutshell, properly covering and storing my boat is an integral part of the winterization process. It guarantees that my boat remains in good shape during the colder months – all while ensuring that it’s ready to hit the water again once the winter season comes to an end.